Go语言编程思想4——测试与性能调优
点击阅读更多查看文章内容
Go语言编程思想4——测试与性能调优
Debugging Sucks! Testing Rocks!
多做测试,少做调试
Go语言使用表格驱动测试
一、传统测试
正确结果在前,函数结果在后,判断是否相等
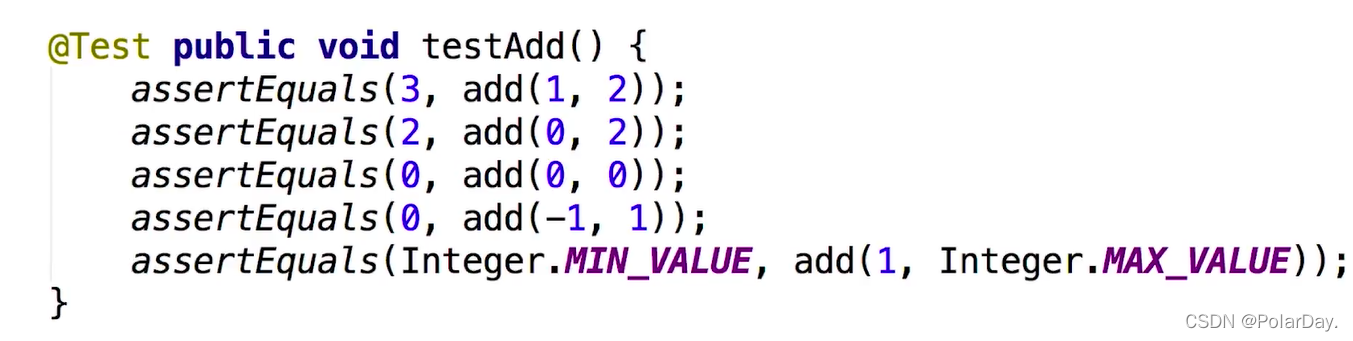
- 测试逻辑和测试数据混在一起
- 出错信息不明确
- 一旦一个数据出错测试全部结束
二、表格驱动测试
将测试数据写在struct中,a + b = c
卸载for循环中判断add(a,b)是否等于c,若不等于再进一步处理
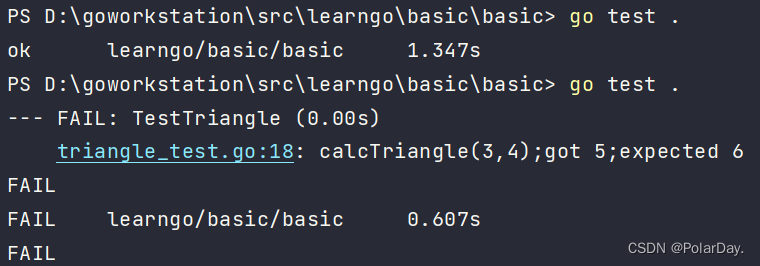
测试文件命名:测试的东西_test(若不按照标准命名则无法执行测试函数),本例文件命名为Triangle_test
测试函数命名需要为Test+测试名称
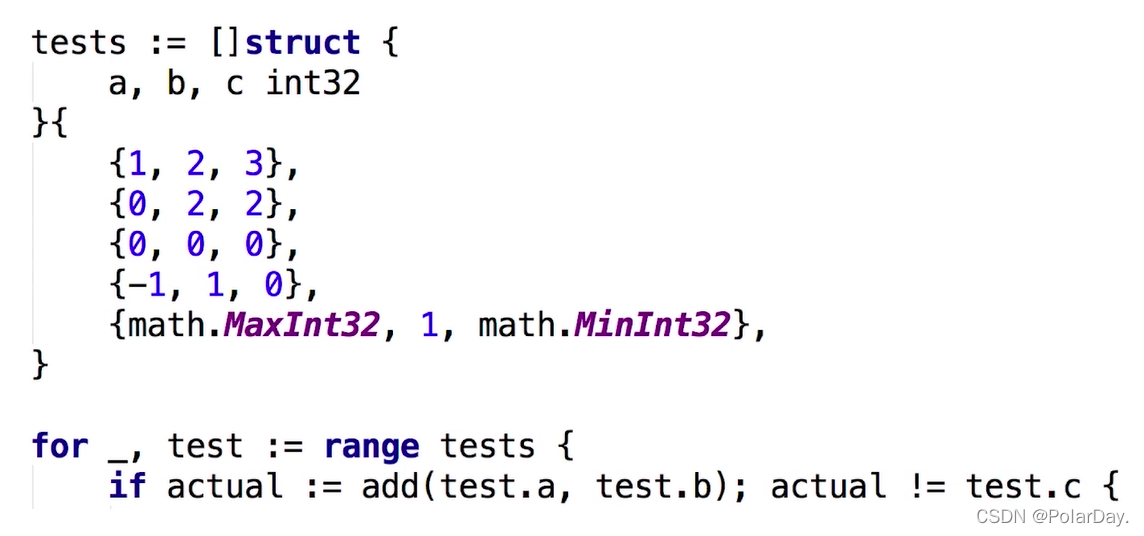
- 分离的测试数据和测试逻辑
- 明确的出错信息
- 可以部分失败
- go语言的语法使得我们更易实践表格驱动测试
1 |
|
在命令行中运行测试,进入test文件目录,运行
go test .
三、代码覆盖率
查看测试代码的代码覆盖率
运行测试函数:run ‘…’ with Coverage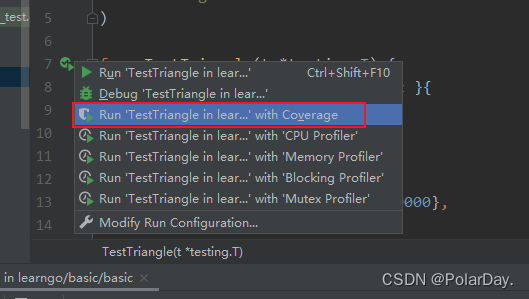
被测试的代码中,绿色的是覆盖到的,红色是没有覆盖到的,点击绿色部分可以看到覆盖了多少次
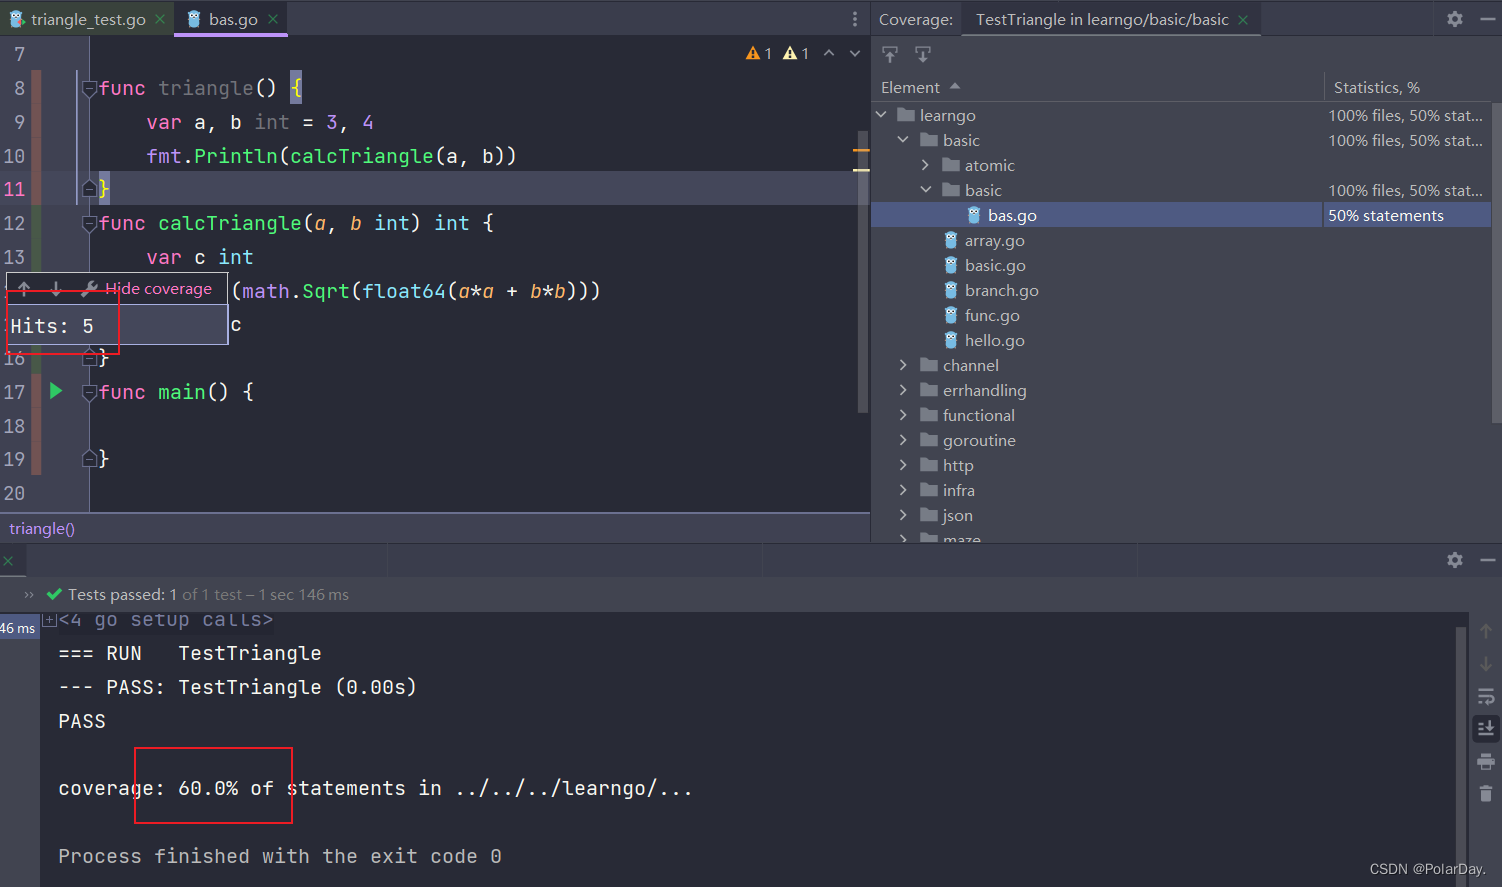
命令行
go test -coverprofile c.outgo tool cover -html c.out

四、性能测试
在Triangle_test文件中继续创建下列函数
注意函数命名需要为Benchmark+测试名称
b.N为测试次数
1 | func BenchmarkTriangle(b *testing.B) { |
结果: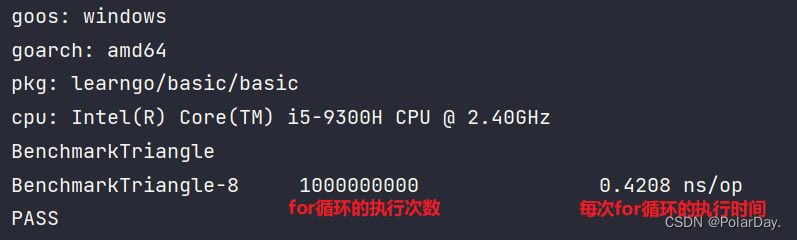
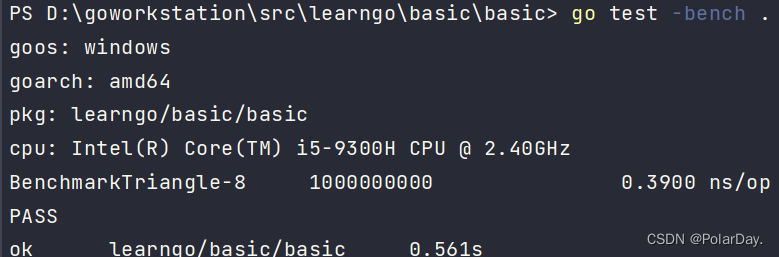
命令行
go test -bench .
五、pprof性能调优
命令行命令:
go test -bench . -cpuprofile cpu.out获得cpu性能的日志文件cpu.outgo tool pprof cpu.out查看日志文件- 执行完pprof后会进入命令行,再执行
web命令可以进入web页面可视化日志文件,这里需要先安装Graphviz,链接放在下面直接下载安装即可。
Graphviz
可视化结果:
方框越大,箭头越粗,耗时越长

优化map的方法
map是哈希表实现会有判重等操作
可以使用空间换时间a:=make([]int,0xffff)
假设中文字符最大就是0xFFFF,这里开一个0xFFFF大小的数组可以存储所有字符
使用:a[‘e’]=1(实质:a[0x65]=1);a[‘课’]=1(实质:a[0x8BFE]=1)
性能调优的步骤
- -cpuprofile:获取性能数据
- go tool pprof:查看性能数据(web可视化)
- 分析慢在哪里(哪个框最大)
- 优化代码
- 再用-cpuprofile获取性能数据,查看优化结果,继续优化
六、http测试
两种方法
- 通过使用假的Request/Response
- 通过起服务器
测试的函数参考之前笔记7中的服务器统一错误处理
1 |
|
七、生成文档
用注释写文档
在测试中加入Example
使用go doc/godoc 来查看/生成文档
1 |
|
示例代码:
也可以当做测试来做
函数命名为ExampleQueue_+函数名
注释为标准答案,先写Output,格式必须严格一致
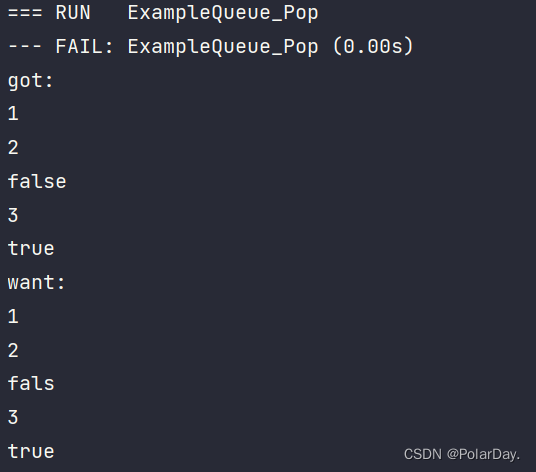
1 | func ExampleQueue_Pop() { |
生成文档:
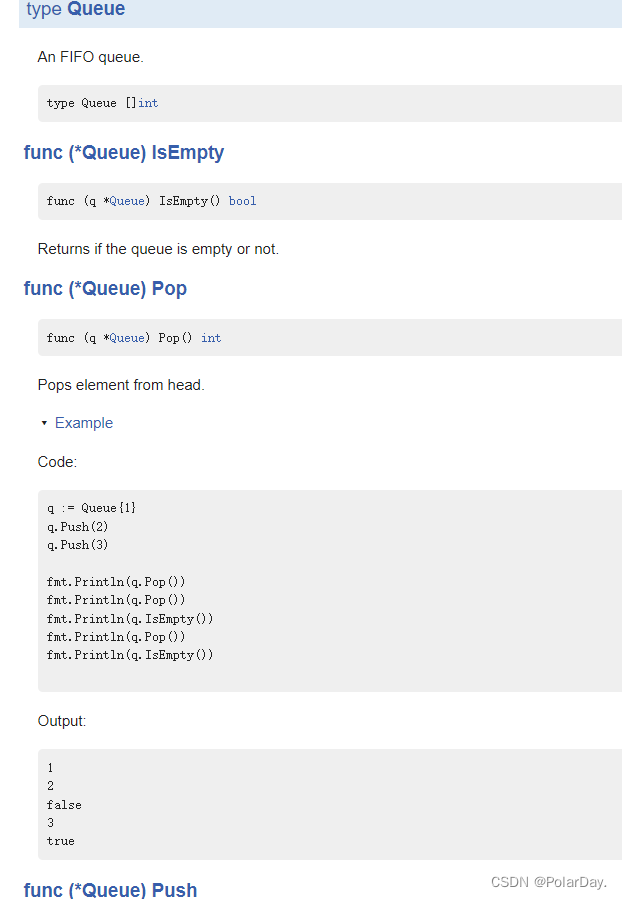
Example可以看作是特别的test,可以执行函数进行测试(注释为想要得到的结果),同时也可以生成文档的example
若将注释中的false删掉e,执行函数得到以下结果
Go语言编程思想4——测试与性能调优